For those readers that dont’ know, I have a blog that I created for my online cooking lessons. But so far it hasn’t been visited much so I thought I would remedy that by sharing some of the recipes here too.
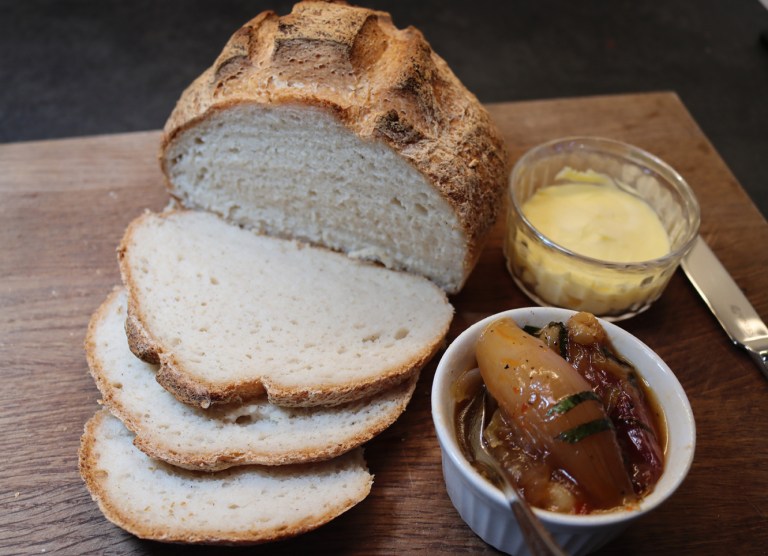
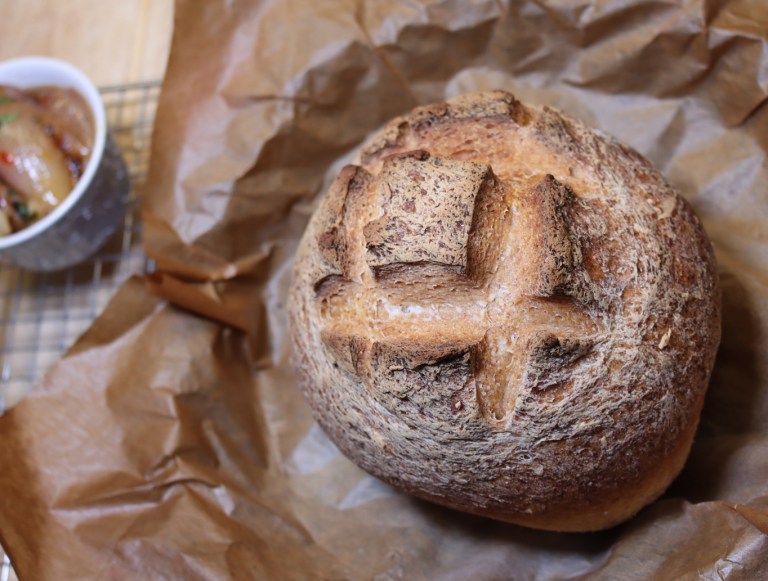
I was very surprised and please with both the taste and texture of this first attempt at gluten free bread. Of course I had spent a lot of time looking at other recipes before I created mine.The crust was chewy as you might find on an artisanal loaf with lots of flavour.
The texture of bread was light held its form well, not dense like many gluten free “bricks” but spongy and fluffy interior. We are intending to make sandwiches with the what is left and I am curious to see how well it holds up the next day. Scroll down to find the recipe.
For anyone interested in my online cooking lessons, you can signup via my Patreon page or on my YouTube channel I am happy answer questions about online cooking classes just send me a message.
Amazing Gluten Free Bread©KevinAshton 2025
Wet ingredients
20 grams whole psyllium husks
400 grams warm water (use a digital scales for accuracy)
Dry Ingredients
400 grams Doves Gluten Free Bread Flour
12 grams table salt
Yeast mix
7 grams (1 packet) instant yeast
23g warm water
12g cider vinegar
15 grams clear honey
Method:
- In a small bowl, mix together the yeast, honey, vinegar and 23 grams warm water (37 C) and stir well. Now stir in 1 teaspoon flour (from the 400 grams). Set aside for 10 – 15 minutes, or until the mixture starts bubbling.
- In a separate medium bowl, mix together the psyllium husk and 400 g warm water and stir well. After about 1-2 minutes a gel will form.
- In a large mixing bowl or stand mixer, mix together the gluten free bread flour and the salt.
- Next, add the psyllium gel and the yeast mix to the flour and mix well. Knead using a dough hook on a low speed for 5-10 minutes, or bring the mix together with your hands and knead for 5-10 minutes on a lightly oiled surface.
- Shape the dough into a smooth ball on an oiled counter (pinch any seams together). Lightly oil the large mixing bowl and put the dough back into it.
- Cover with a clean tea towel and put the bowl in a warm place for 1 hour to allow the dough to double in size.
- Once doubled in volume, the dough can be shaped. The process is very similar to the shaping done before the bulk fermentation, with the exception that it’s done on a lightly floured surface.
- Knead the dough for a second time using the heel of your hand to work more air into the mixture. Then work the dough back into a ball making sure to seal the seams.
- Place the dough ball onto a lightly oiled piece of parchment paper and carefully move the paper and dough to a cast iron skillet.
- Cover with a clean tea towel and prove for a second time for 1 hour.
- After 30 minutes, preheat your oven to 250 C (480 F). Add a baking tray on the bottom shelf. And boil a kettle of water.
- When the bread has doubled in size take a sharp knife and score the dough creating a criss-cross pattern.
- I placed a deep baking tray into the lower part or bottom of the oven and filled the tray with hot water to add moisture to the oven. I then placed the skillet with bread onto the middle shelf.
- Bake the bread for 20 minutes at 250 C, and then carefully remove the water tray.
- Turn the heat down to 230C (450F) and bake for a further 40 minutes. The loaf should be end up being a deep brown colour but if browns too quickly you can cover it with foil.
- Transfer the loaf onto a wire rack and allow to cool completely before slicing. This is to allow the crumb to set and takes at least 1 hour.
Chef’s Notes
I weighed the water on digital scale for accuracy. The vinegar should be apple cider vinegar for best results. Psyllium Husk is available in speciality food stores in the UK. I bought mine from Grape Tree. Once the loaf is cooled you could slice up the loaf and freeze indiviual slices as long as they are well wrapped before freezing.
Shallot Chutney
As you can see in the photographs I have also made a savoury shallot chutney to offer with the fresh buttered bread.

I’m sharing this with friends who need eat gluten-free.
LikeLiked by 2 people
Thanks Peggy.
Best Wishes
Kevin 🙂
LikeLiked by 1 person
I have been there, great blog.
LikeLiked by 2 people
Thanks William for your friendship and support.
Best Wishes
Kevin 🙂
LikeLike
Looks wonderful and delicious.
Thank’s for share Kevin, say hello to Sophie.
All the best!
LikeLiked by 1 person
Thank you Elvira . Sorry for my slow reply, 4 weeks ago I had an oral implant and it is still giving me pain. Hopefully the dentist can sort it out.
Sophie is happy and well thanks for your kind wishes.
Kevin x
LikeLiked by 1 person
Don’t worry about it Kevin.
Thank’s for your kindness,hoe you?
LikeLiked by 1 person
My mouth is taking longer to heal but it is healing.
Thank you for your kind thoughts and friendship Elvira.
LikeLike
Thanks Kevin. Don’t worry about it.
Hope soon
LikeLiked by 1 person
Thanks Kevin. Hope you feels better soon, take care.
LikeLiked by 1 person
Don’t worry about it Kevin.
Thanks for your kindness.
Take care a lot.
Sounds Sophie is having fun, thanks her. All the best for both.
Elvira x
LikeLiked by 1 person
Looks to have great structure and hold together well – in fact, it looks like proper bread.
LikeLiked by 1 person
Thank you so much and apologies for my slow reply.
Best Wishes
Kevin 🙂
LikeLiked by 1 person
No worries – you are clearly a busy man! 🙂
LikeLiked by 1 person
Wow! This doesn’t look gluten free!
LikeLiked by 1 person
Thank you so much Dorothy, this is the best gluten free bread I have tasted. It took some work when I was tweaking this recipe but I was very pleased.
Best Wishes
Kevin 🙂
LikeLiked by 1 person
Great job Kevin!
LikeLiked by 1 person
Please don’t worry about it Kevin.
Hope your pain has gone, take care.
Thanks to Sophie, all the best for both.
Blessings.
Elvira x
LikeLiked by 1 person
Sorry to hear about your pain. I hope it gets better soon!
LikeLiked by 3 people
Thanks Terre it finally has.. and thanks for your kind wishes.
Kevin 🙂
LikeLiked by 1 person